
Sortiert man die getrockneten Funde nach ihrer Form, zeigt sich, was sich daraus machen lässt: Eine runde Schale wird zum Schildkrötenpanzer, flache Stücke ergeben Blütenblätter. Teures Werkzeug braucht man dafür nicht. Hier sind 12 einfache DIY-Projekte mit Strandfunden.

Sand und Meergeruch entfernen
Strandfunde enthalten oft noch organische Reste – ohne Reinigung kann es unangenehm riechen. Spiralförmige Schneckenhäuser brauchen dabei mehr Aufmerksamkeit, weil sich Sand im Inneren sammelt.
Eine Mischung aus Wasser und einem Schuss Haushaltsessig löst Salz und Gerüche, ohne die Kalkschale anzugreifen:
- Soaking Die Fundstücke 10 Minuten in warmem Essigwasser baden.
- Scrub Mit einer alten Zahnbürste den Schmutz sanft abbürsten.
- Drying Auf Küchenpapier vollständig an der Luft trocknen lassen.
Heißkleber oder Bastelkleber?
Auf glatten Muscheloberflächen hält normaler Schulkleber kaum. Für schwerere Stücke eignet sich die Heißklebepistole besser. Beim Basteln mit Kindern ist dicker Bastelkleber sicherer – er trocknet langsamer, lässt sich aber leichter handhaben.
Wasserfarben perlen auf Kalk ab. Acrylmarker haften besser und trocknen wischfest.
Muscheltiere: 4 einfache Ideen für Kinder
Wer die Fundstücke genau betrachtet, entdeckt darin oft schon Gesichter oder Körperformen. Das Zusammenfügen der Schalen schult nebenbei die Feinmotorik.
Vier Projekte mit Bastelkleber:
- Owls Zwei flache Muscheln bilden die Augen auf einer länglichen Basis.
- Turtles: Vier kleine Schalen als Beine unter ein gewölbtes Haus kleben.
- Crabs Spitze Bruchstücke ergeben gute Krabbenscheren.
- Bears: Zwei kleine, fächerartige Muscheln werden zu Ohren an einem großen Kopf.
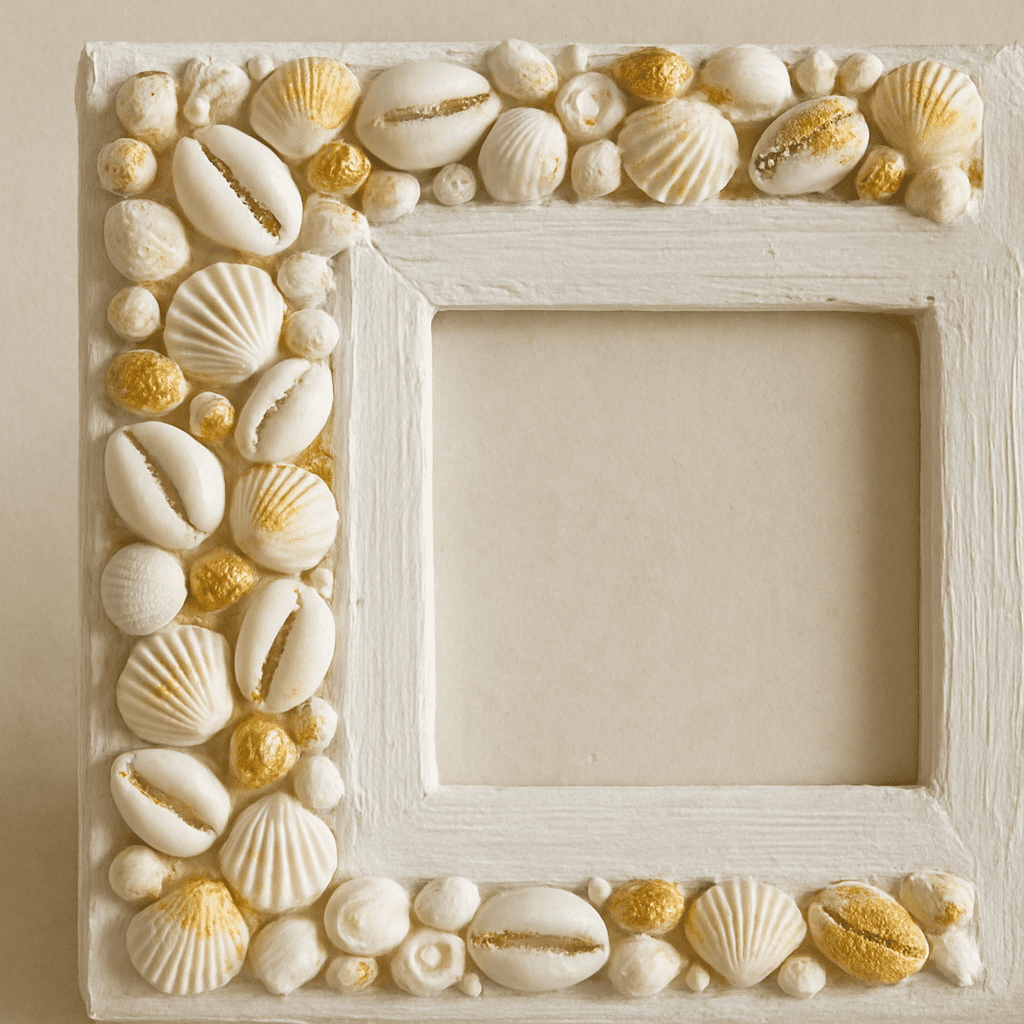
Maritime Deko für Erwachsene: 4 Ideen für Rahmen und Kerzen
Für schlichte Alltagsgegenstände reicht oft eine Heißklebepistole. Flache Muscheln leicht überlappend aufkleben – ähnlich wie Dachziegel – vermeidet Lücken. Etwas Acryl-Goldfarbe an den Rändern setzt einen ruhigen Akzent.
Vier Ideen:
- Shingle frame: Überlappende Schalen kaschieren günstige Kanten.
- Schmuckschale: Eine große Jakobsmuschel mit goldener Kante als Ringablage.
- Shell candles Wachs mit Docht in tiefe Fundstücke gießen.
- Driftwood art: Helle Muscheln auf verwitterte Äste kleben.
Schmuck und Spiele: 4 Projekte mit Strandfunden
Die kleinsten Funde lassen sich zu Schmuck oder Spielen verarbeiten.
Vier Ideen:
- Tic-Tac-Toe: Je fünf Muscheln mit Kreuzen und Kreisen bemalen.
- Kette: Muscheln auf ein stabiles Band fädeln und mit einfachen Knoten sichern.
- Miniature Worlds: Kleine Feengärten oder Sandbilder mit Muscheln gestalten.
- Windspiel: Muscheln an Zweige binden, damit sie im Wind klingen.
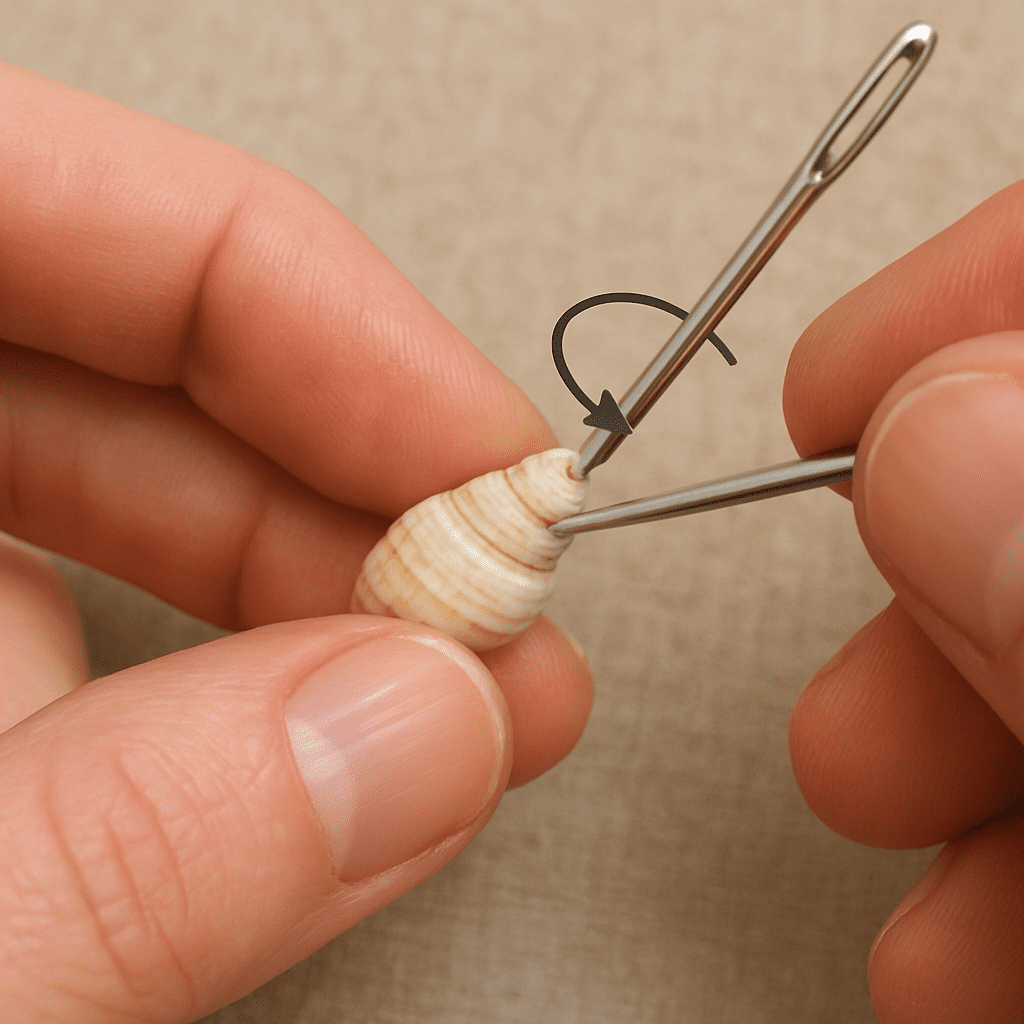
Löcher in Muscheln ohne Bohrmaschine
Um Muscheln aufzufädeln, braucht es kein Werkzeug. Die dünnste Stelle der Schale suchen und die Muschel auf ein weiches Handtuch legen.
Dann mit einer Stopfnadel ansetzen und die Spitze sanft hin- und herdrehen – nicht drücken. Die Rotation reibt das Material langsam und ohne Risse ab.
Schutz für die fertigen Arbeiten
Übrig gebliebene Bruchstücke lassen sich in ein Glas füllen – als einfache Dekoration ohne weiteren Aufwand.
Eine dünne Schicht Klarlack oder Haarspray schützt bemalte Flächen vor Staub und Auskreiden.
